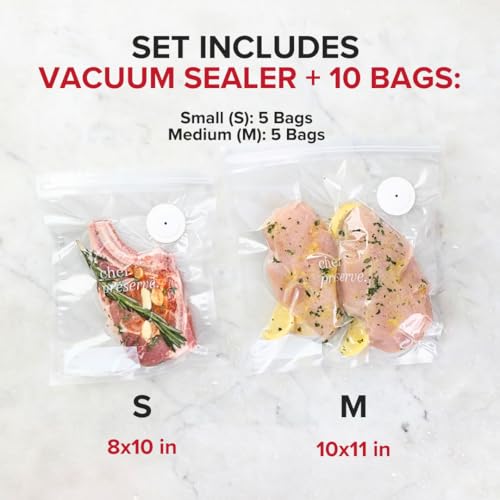


Chef Preserve Compact Vacuum Sealer for Food (Vacuum Sealer Machine + 10 Reusable Vacuum Bags) Powerful Handheld Vacuum Sealer Machine, Seal Meal Saver, Portable Food Sealer
EUR 25.35 (as of April 18, 2026 02:10 GMT +00:00 - More infoProduct prices and availability are accurate as of the date/time indicated and are subject to change. Any price and availability information displayed on [relevant Amazon Site(s), as applicable] at the time of purchase will apply to the purchase of this product.)How To Print On Ceramic Mugs Perfectly
A hot question being asked frequently nowadays let’s figure out why…
Our coffee mugs do have an emotional bonding with us, they definitely pump the required boost to our mornings. Sipping out of them and holding them is a kind of ultimate pleasure and a good way to say GOOD MORNING to yourself or your loved ones.

As the emotions are getting connected to this kitchenware the urge of customizing them for yourself and your loved ones is getting high day by day. Even people are using this customization to promote their idea or even a business.
Different firms like to present printed ceramic mugs as a souvenir to their potential customers as they can stay in sight, so in mind.
So I m writing this blog today to motivate you and assist you in this brilliant money-earning artistic field where your DIY hobby can earn you a good living if not fully but partially.
Let’s start with Sublimation printing
Tea Forte Kati ceramic Cup
Salient Features
This one is the most long-lasting still most easy way of customizing your own mugs. You need to follow a few steps and yes here you go with your perfect printed ceramic mug. First of all, you need the following equipment to start
- An artistic and well-composed design
- A sublimation printer
- A heat transfer machine
- Sublimation ceramic mugs
- Sublimation inks
- Sublimation Paper
- Heat transfer tape
- Scissors
- A Tub of Cold Water
If you are loaded with your stationery here you go. you can select your image according to your choice or what your customer is asking for. If its something special just go ahead, Perfect and complete accurate measurements are the secret of an amazing print.
Choose Perfect Graphics
Definitely, when you are up to printing a mug. First thing and your first concern is your image or design or a logo, or what ever you want to print.
For more intricate designs you can choose Corel Draw, Photoshop, and Adobe the choice is yours and the scope is unlimited. Even you can download several templates according to your wish from different free and paid websites as well.
- The most important thing which you need to consider while designing your template is accurate measurements. For instance, if you are going to print an 11-ounce Mug. your desired dimension should be 3 inches in height and 9 inches in width.
- Another thing that will help you while you are printing, is the base coat of a sublimation mug. Sublimation mugs are coated with a special base that is not very much possible at home, it is actually done commercially in factories so while choosing your mug make sure that the sublimation base is here to support you.
- Moreover, when you are printing make sure that the shape of the mug is supportive enough. if that’s not the case and it’s slightly Tempered from the top or bottom. I don’t insist you to quit but just modify the technique. Leave a cavity, a quarter-inch away from the top and a quarter-inch away from the bottom and here you go with your perfect print. No bleeding no misprinting.
- By following this tip you can save a few more bugs and earn a little more profit. instead of always using a new sublimation paper for the same design, you can print it on the same sheet for as many times as the sheet can work with it. It will not only save your paper but will consume less ink indeed.
Second Step Of Sublimation Printing on Sheet
Now after designing Your template, you need to transfer it perfectly on your mug. For that first of all, you need to size the paper according to your mug as there are different sizes available. so make sure that either the paper is already sized according to your mug or you size it afterward.
1: Select the Right Options for the right printing, make sure that you have chosen the option “Mirror image” to print. Moreover, don’t select resolution any more than 300 DPI as it will consume more ink and involve more printing time. wastage of money.
2: As you are still printing on the paper make sure that you are using the coated side. and when your sheet is ready with the perfect design, let’s move forward to step 3
Third Step Of Sublimation Printing
While your paper printing is done now this is the time for something practical. Let’s adjust the paper according to your cup if I know you have already done it but now we need to fix it on the cup or the mug or any other sublimation product of your choice.
1: Make sure the paper is fully in contact with the surface of your product. because any gap or any loophole can cause you a misprint.
Fourth Step Of Sublimation Printing With Press
Now in the fourth step when your mug is ready and properly covered with a printed sheet. you just need a press to transfer It permanently on your mug. Set the temperature, on 400 degrees or 204 Fahrenheit, prepare your press for the transfer. Now we need to fix the pressure adjustments from medium to high so that no area remains untouched. if you have a timer setting engage it for 4 to 6 minutes.
Transfer timings can vary depending on the type of your press and your mug.
1: For excellence in time settings, experience, and experimentation will lead you to accuracy.
2: Any extra pressure can cause the cups to collapse due to intense heat.
Fifth and Most Important Step
When the press is already heated at the required temperature of 400 degrees now this is the most technical and crucial time.
As if you placed the mug accurately without hurting your hands and without misplacing your paper you will definitely get the best results. but if any cramp or a crumble occurred, you can definitely get errors in your printing.
1: Be careful, save your hands, and don’t let the paper move which is wrapped around the mug as it is responsible to transfer the drafted print.
2: Another technical thing is to make sure the mug is in the perfect grip with your press. but still not any extra pressure that can give your blast. definitely, you don’t want to ruin your mug and the whole effort.
Now, this is the time to see the result, and if you have followed all the steps nicely and neatly you will definitely get the ultimate results. But keep in mind while taking out your Mug from the press you must be wearing some safety gear as it will be extremely hot.
1: While bringing your mug out from the press make sure that it doesn’t get stuck anywhere.
2: Once your mug is out from the press don’t remove the paper immediately wait for a while, let the mug cool down in front of any open window, and once you feel it is cold enough to touch. Remove the tape and paper.
And here you are I am sure in the end you will find all hard work paid as you will definitely get what you’re looking for, or what you are working on.
How to print a photo on a mug using an iron?
Using an iron instead of a sublimation press will not provide you the ultimate results but still, it’s an option. you have to follow a few steps and you will get the job done.
- First of all, you will need a perfect template printed out on a sublimation printer.
- Secondly, you will need to fix the template around your mug as tightly as possible leaving no crease and cramp.
- Fixed tightly in place with the help of heat-resistant tape.
- Now you need to put some pressure with the help of iron instead of a heat press.
- This is a bit technical as any extra pressure can break the cup or scratch the sheet.
- I suggest you wrap a foam sheet around the mug. after wrapping the design template and then apply slight and nice pressure. Until you feel all the areas fully covered and nothing left untouched.
- As you are using an iron do use safety gear for your hand as well. because the ceramic mugs will get extremely hot. Moreover, direct contact with it while you are pressing the image can harm or burn your hands.
- Now let the mug cool and wait until you can touch the mug and separate the paper and tape to see the results.
- I don’t promise that you will get a hundred percent results as are obtained with sublimation press but still for a DIY user it’s not a bad option.
Final Words
By the end of this article, I actually hope that you have got all that you looking for. Moreover, don’t get puzzled that how companies print their Mug?
Because the sublimation method mentioned here is no different from the one being used by professionals. Now you know how to sublimate a mug and that is a good time to start your new business. Just Grab a few customers pick some orders, arrange a few coated sublimated mugs and here you go.
you don’t need lots of equipment to do so only a small investment can lend you hand in starting a new business. Believe me its worth a try best of luck and have a happy printing. you can even gift one to your best friend or to your loved one at least I will !